
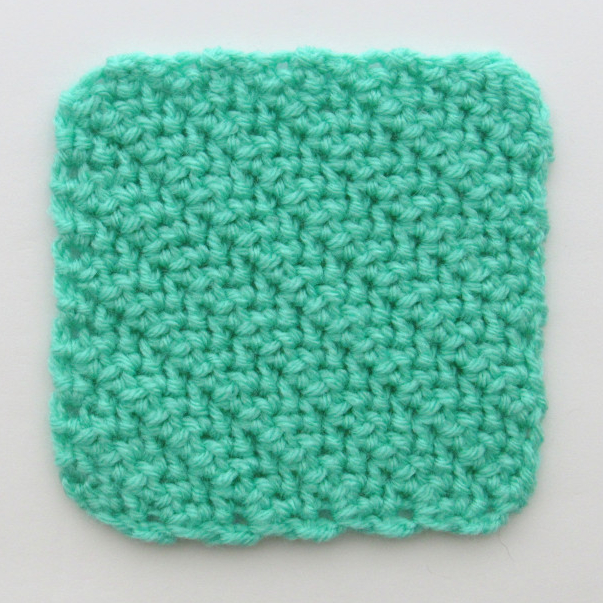
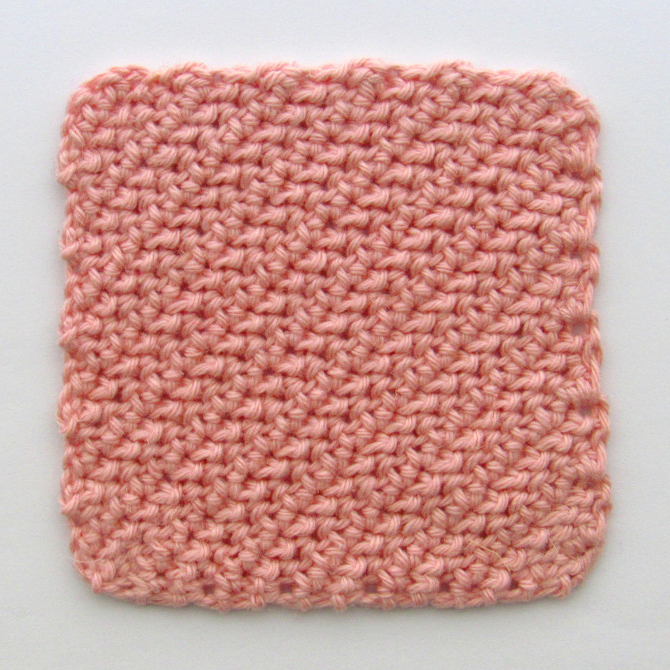
This is possibly my favorite C2C variation I’ve worked on so far. Like the lemon peel stitch, this stitch has a really wonderful texture that seems to work well with any type of yarn. The herringbone hdc stitch is a simple variation on the normal hdc stitch that really changes the look and texture of the hdc stitch. The herringbone hdc stitches are slanted stitches that, unlike the hdc stitch, don’t have the appearance of a straight line created by a front loop. Instead, a line of little bumps is made.
Unlike the normal herringbone hdc stitch, where the lines would run horizontally from one side to the other, the lines in the C2C herringbone hhdc stitch piece run diagonally, starting from one corner at the bottom and running to the top corner on the opposite side of the piece. The basics of this method are making a ch-2 space at the beginning of each row that will be worked in at the end of the next row. This means you’ll be making an increase of two stitches per row. When it comes to decreasing, with the exception of the first decrease row, a total of two decreases will be made per row. One decrease will be made at the beginning of a row while the second will be made at the end. You should always have an even number of stitches for each row.
As a little aside for those wondering about substituting the herringbone hdc with the herringbone dc stitch: my first attempts at a C2C herringbone variation were with the herringbone dc stitch and I could not find a way to create a square that had a similar stretchiness along the starting and closing sides. The sides created at the beginning were so much more elastic than the closing sides. So, if you’re thinking about using this method to make a triangle, then substituting the herringbone hdc with a herringbone dc would be fine. However, I don’t recommend this change for creating a square.
Below are text instructions for making a C2C herringbone hdc stitch crochet square. A pdf download of this pattern that contains step-by-step photo guides along with instructions for making a C2C herringbone hdc rectangle can be found at my etsy shop here. You can also favorite/queue it on ravelry here.
Materials needed:
Any kind of yarn
A crochet hook in a size appropriate for the yarn used
Yarn needle for weaving in ends
Stitch abbreviations (in US terms):
C2C: Corner to Corner Crochet
ch: chain stitch
hhdc: herringbone hdc stitch
sl st: slip stitch
st/sts: stitch/stitches
Notes:
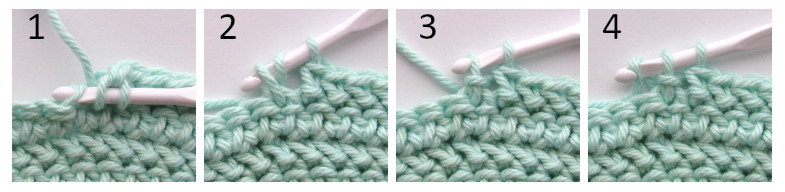
A. HOW TO MAKE A HERRINGBONE HDC STITCH
- Yarn over, insert your hook into the stitch. (Two loops on the hook.)
- Yarn over and pull through the stitch. (Three loops on the hook.)
- Do not yarn over. Pull the left loop through the middle loop. (Two loops on the hook.)
- Yarn over and pull through the remaining 2 loops.
B. ch-2 spaces: a ch-2 space will be created at the beginning of each row. This space will not be worked in until the end of the following row. That space might be hard to get to if you’re not used to it. So after chaining 2 at the start of the row, take a stitch marker and place it around the chain that’s closest to the hook before you make the next stitch. This can help you find that space when it needs to be worked in the next row.
C. ch-1 spaces and slip stitches: In the “CLOSING YOUR SQUARE” section, you will see instructions to “turn your work and ch 1” and to “make a sl st, ch 1, and make a hhdc” . These ch 1 spaces and slip stitches will not be worked in later in the pattern.
STARTING THE C2C HERRINGBONE HDC STITCH
Row 1: ch 3 and make 2 hhdc in the third chain from the hook.
Row 2: turn your work and ch 2. Make a hhdc in the 3rd st from the hook (the last hhdc of the previous row) and in the next st. Make 2 hhdc in the ch-2 space.
Row 3: turn your work and ch 2. Starting from the 3rd st from the hook (the last hhdc of the previous row), make a hhdc in each st to the ch-2 space. Make 2 hhdc in the ch-2 space.
Row 4+: Repeat Row 3, starting each row with a ch 2 and making a hhdc in each stitch until you get to the ch-2 space at the end, where you work 2 hhdc.
CLOSING YOUR SQUARE
Row 1: turn your work and ch 1. Starting from the first hhdc of the previous row, make a hhdc in each st to the ch-2 space. Make a sl st in the ch-2 space.
Row 2: turn your work and ch 1. Skip 1 st (the previous sl st) and make a sl st in the next st. Ch 1 and make a hhdc in the next and every hhdc until the last hhdc. Make a sl st in the last hhdc.
Row 3+: Keep repeating Row 2 until you have 4 hhdc sts left. Then move to the Final Row.
Final Row: turn your work and ch 1. Skip 1 st (the previous sl st) and make a sl st in the next. Ch 1 and make a hhdc in the next 2 sts. Make a sl st in the last st.
